


Building a home with a residential elevator is an important task. Depending on the homeowner, this elevator could be used for convenience, or out of necessity to move around their home. Residential elevators are an increasingly popular option for both uses, and with proper design and installation, they can be the perfect addition to a home.
No matter what kind of elevator you’re tasked to build or design for a client’s home, it’s important to understand the basic anatomy of an elevator shaft and the role they play in structure and design. An understanding of what goes into planning a residential elevator is similarly critical, so we’ll cover some of that too.
A builder’s guide to elevators
But first — let’s discuss some of the most common types of home elevators.
Hydraulic Elevator
Hydraulic elevators have become increasingly popular in residential construction — they utilize a cab that’s attached to a hydraulic jack. The elevator relies on a pump that moves non-compressible liquid (such as oil) from a fluid reservoir into a cylinder through an open valve. Then, the fluid builds up inside the cylinder which will ultimately push up a piston that raises the cab to the corresponding floor. Typically, the hydraulic pump and reservoir are located adjacent to the elevator shaft, so it’s essential to account for the room this will take up.
By the way, if you’re curious about what goes into maintaining a residential elevator, have a look at this.
Traction Elevator
Hydraulic elevators are a popular choice for low-rise construction, while it’s more common to see traction elevators in high-rise construction. A traction elevator is typically more energy efficient than a hydraulic elevator because it relies on less energy consumption. The traditional traction elevator is operated by cables that are connected to the top of the cab which are moved by an electric motor located in a room above the elevator shaft.
Traction elevators may be geared or gearless based on building height, speed requirements, and cost considerations. For small, low-rise buildings, it’s more common to see geared traction elevators. On the other hand, gearless traction elevators (which are more expensive) are seen in the bigger, taller buildings.
MRL Elevator
MRL (machine roomless) elevators are an excellent option for residential elevators because they take up less square footage than some other options as it doesn’t require a machine room. They work much like geared traction elevators, but the machinery is located within the elevator shaft in the hoistway rather than in a separate penthouse above the elevator shaft.
Want to learn more about the different types of elevators? Have a look at some of the options we offer at RAE.
An architect’s guide to elevator shaft anatomy
Now, let’s cover some of the most critical components of elevator shaft anatomy. Before a builder or an architect designs and constructs a residential elevator, an understanding of these components is a must.
The pit:
The pit is the depression below the surface of the lowest landing — this component allows the floor of the elevator to be even with the floor on the lowest landing. When designing a residential elevator, an architect must ensure there’s a safe space below the car for the safety of a technician working under the car. To emphasize the importance of this design element: most of the force the elevator is subjected to is transferred to the pit floor which means it must be durable and properly designed.
The overhead:
Think of the overhead as the opposite of the pit — it’s the space above the top of the upper finished floor to the nearest overhead obstruction within the shaft. When the elevator car is on the top floor, this space allows the floor of the car to be level with the floor of the uppermost level. The architect must ensure there’s a satisfactory amount of room in the overhead for a technician to safely work.
The rail wall:
Most residential elevators typically entail a cantilever design and force is applied to both the pit floor and the wall. Guide rails are anchored into backing within the elevator wall and this is called the rail wall. It functions to guide the elevator into a parallel position with the entrance of the hoistway, as well as providing a stable surface for the elevator car safeties to deploy. An architect must design an elevator with adequate backing in the rail wall to allow for stable functioning and wear on the elevator.
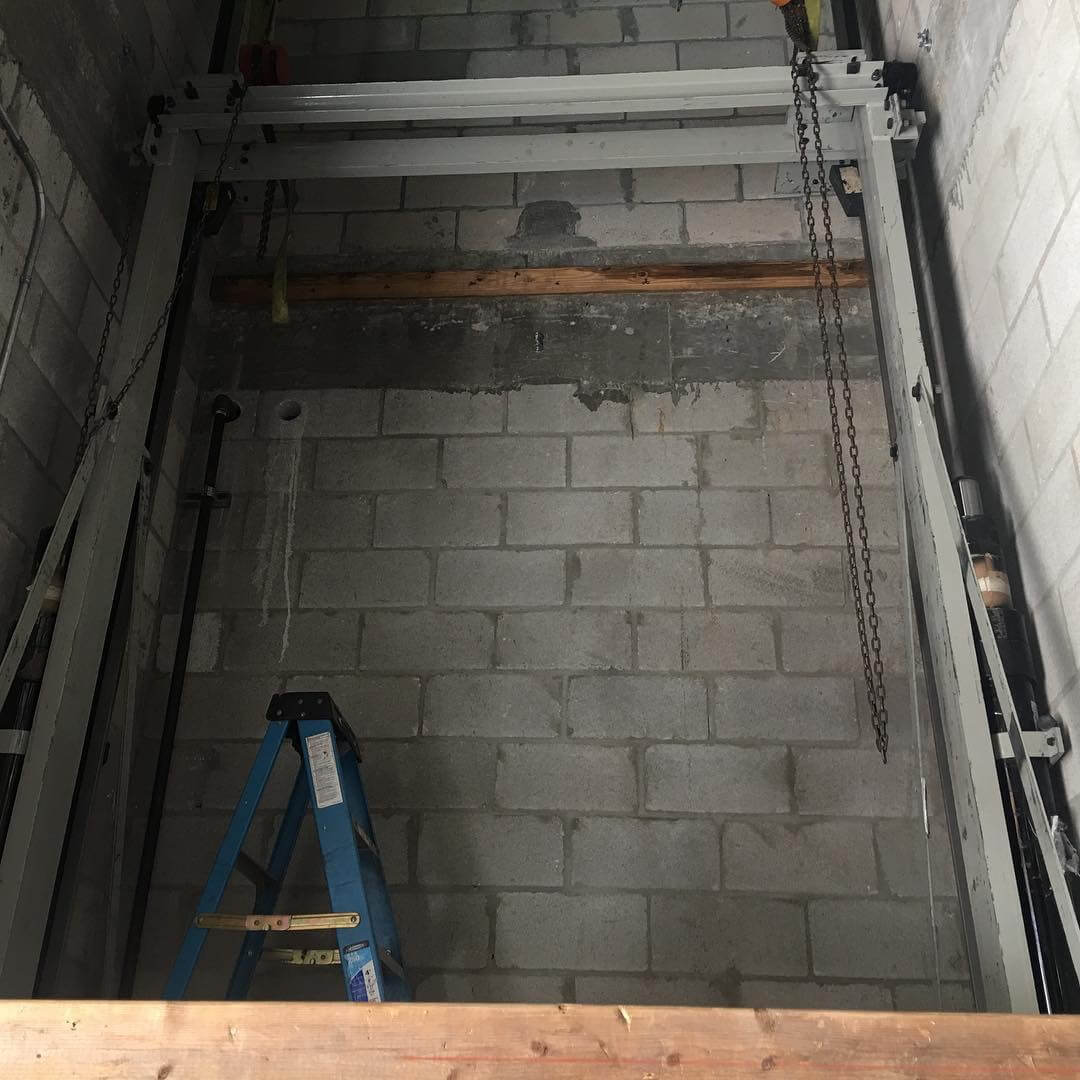
The hoisting beam:
In certain jurisdictions, a hoisting beam must be installed at the top of the elevator shaft. It can be used during installation to move and support the elevator.
A builder’s guide to planning a residential elevator
Once an architect has designed a residential elevator, the building needs to make a plan according to the specs provided by the architect. These are some of the elements a builder (and architect) must consider.
- Both the builder and the architect must ensure the elevator meets the requirements of ASME A17.1 Part V/CSA B44-13.
- The homeowner’s intended use for the elevator
- Local, state, and national code requirements of the site
- Consider space requirements for hoistway construction and the finished hoistway, the elevator car, pit depth, and overhead clearance. For example, with our standard hydraulic “Quiet Ride Lift,” it requires an 8-foot cab with “110” overhead clearance
- The finishings around the landing door frames and landing entrances
- Providing the required building permit(s) and/or engineering services according to local authorities
Of course, this is just a starting point for the considerations builders and architects need to keep in mind. With Rise Above Elevator’s contractor services, our highly trained field management team can assist contractors through every step of our process. We believe in being an asset to your building process — call us today so we can get started!